- Your new Premium BENCH SHIELD and PMRS© are easy to install. You will need the following:
- Tape measure
- Philips screwdriver
- Hand saw
- Drill
- 1/8” drill bit
- 2” Hole saw
Lay out the parts of the BENCH SHIELD + PMRS© system.
- Determine where your vacuum and the BENCH SHIELD Switched Power Receptacle (# BG-T05) will be located. Position the BENCH SHIELD switched power receptacle in relation to your 120 V power source. Position the 3-way receptacle and switch in a location that is accessible from the bench and allows both the 12 Volt adapter and vacuum to be plugged in.
- Remove your bench pin, tray, and drawer from your bench.
- Determine the location of the BENCH SHIELD Vacuum Chase by positioning the vacuum chase hole on the back, or the side of your bench. If the side of the bench will be used, there is an additional 6” vacuum chase and a right-angled vacuum chase included to allow for different configurations. If needed, cut vacuum chase to length with a hacksaw or even your jewelers’ saw.
- Gently insert the 12” vacuum chase pipe into the BENCH SHIELD bench bracket. Position the BENCH SHIELD bench bracket under your bench pin, then run the vacuum chase to the spot where it will go inside your bench and out the back or side, marking the hole.
- Use either a jigsaw or a hole saw bit to cut the 2” diameter vacuum chase hole. This is to accommodate both the vacuum chase pipe and the 12 Volt adapter cord.
- Install the BENCH SHIELD Bench Bracket (# BG-T03) directly under your bench pin using the 4 screws provided.
- Run the 12 Volt adapter and cord through your 2” hole.
- Secure a snug fit of the vacuum chase to the BENCH SHIELD bench bracket. Run the vacuum chase through your 2” hole. Use the provided zip ties to tie up the 12 V cord to the vacuum chase. Attach you vacuum hose to the vacuum. You may want to tape the chase and other components together. *Do not glue the chase and other components together in case you decide to move them in the future.
- Attach the BENCH SHIELD Filter Bag (BG-K001) over your vacuum filter.
- Line the bottom of the vacuum with the BENCH SHIELD Recovery Bag (BG-K001) .
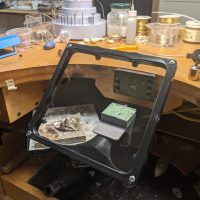
- You are provided a standard and a magnifying lens. Try each by simply unscrewing the 4 screws and inserting the lens in the BENCH SHIELD *When using the magnifying lens, for best results use both lens together, the BENCH SHIELD Magnification Lens behind the BENCH SHIELD Standard Lens, fresnel side toward the standard lens.
- Insert the BENCH SHIELD Face Shield Head into the BENCH SHIELD bench bracket. Plug your vacuum into the white (switched) electric receptacle. Plug your Premium Bench Shield + PMRS™ into the bench bracket.For best results use a removable bench pin and use the Bench Shield without your bench pin.Now you’re ready to start saving time, your health and money!Any questions? Need help? Email us: office@benchguru.bizLike us on FACEBOOKFollow us on twitter @BenchGuruMADE IN AMERICAwww.benchguru.biz (Tel. ) 414-488-2727 Replacing your Bench Shield Lens: Remove the Bench Shield from your bench. Remove the four Philips head screws on the face shield. Remove worn lens then replace lens, replace screws.
When ready to use, insert your Bench and PMRS™ arm into the bench bracket. The shield lights up, flip the white switch, and the vacuum will start. You’re ready to go!
Clean up and Cash In! with PMRS©
Made in America! www.benchgur.biz (970) 367-5317 office@benchguru.biz

Products
-
 POSTAGE ADDED
$45.00
POSTAGE ADDED
$45.00
-
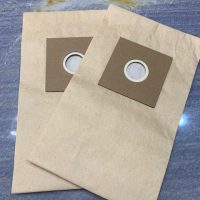 VACUUM REPLACEMENT DUST BAG
$18.00
VACUUM REPLACEMENT DUST BAG
$18.00
-
 BG-PS PMRS® Polishing Compound Saddle
$65.00
BG-PS PMRS® Polishing Compound Saddle
$65.00